No products in the cart.
Have you ever wondered how to use a henna cone to create beautiful designs on your skin? Henna, a natural dye made from the leaves of the henna plant, has been used for centuries to adorn the body with intricate patterns. Using a henna cone can seem daunting at first, but with a little practice and patience, you can master this art form. In this guide, we will explore the step-by-step process of using a henna cone, along with some helpful tips and techniques.
Preparing Your Henna Cone
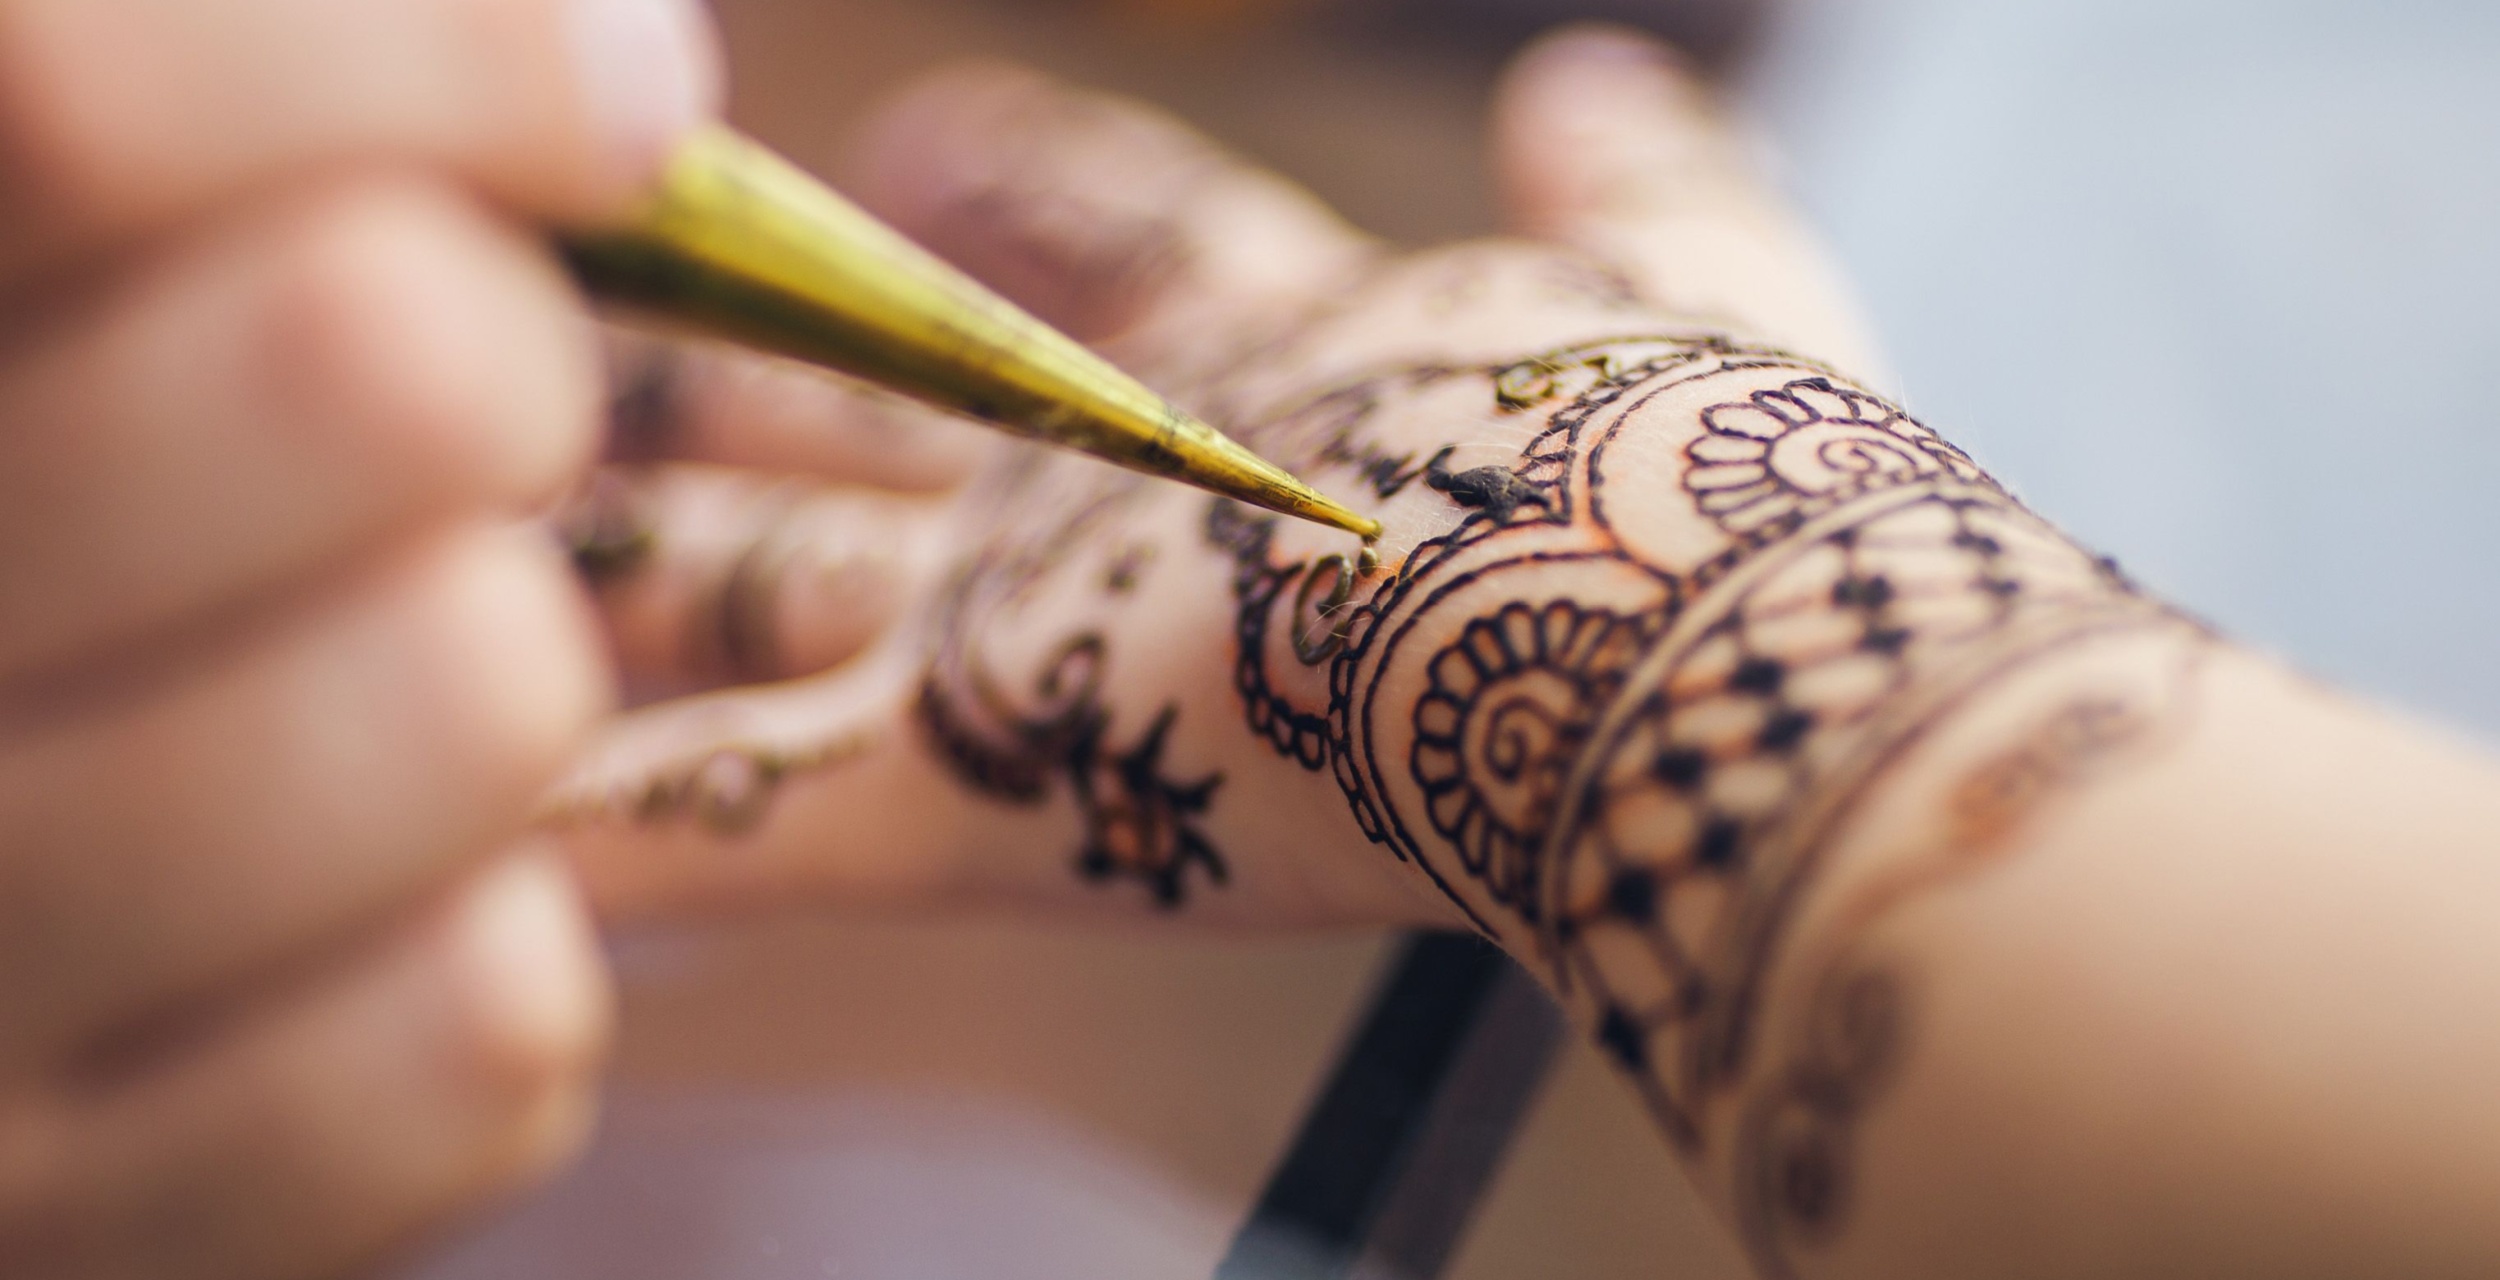
Before you begin, it is important to prepare your henna cone properly. First, ensure that the henna paste is flowing freely by gently squeezing the cone. If the tip of the cone is blocked, you may need to clear it by squeezing and pulling the tip to remove any oxidised paste. Once the paste is flowing smoothly, you are ready to start.
Holding the Henna Cone
The way you hold the henna cone can greatly affect your control and precision. Hold the cone between your thumb and index finger, using your middle finger for additional support if needed. It is crucial to find a comfortable grip that allows you to apply steady pressure. As the henna in the cone decreases, you might need to adjust your grip, folding the top over to maintain pressure.
Applying the Henna
Now that you are ready to apply the henna, start by practising on a piece of paper or a glass sheet. This will help you get a feel for the cone and the flow of the paste. When you feel confident, begin applying the henna to your skin. Here are some steps to follow:
- Start Simple: Begin with basic shapes like dots and lines. As you gain confidence, you can progress to more intricate designs.
- Control the Pressure: Adjust the pressure you apply to the cone to control the thickness of the lines. More pressure will result in thicker lines, while less pressure will create finer lines.
- Steady Your Hand: Use your pinky finger or your non-dominant hand to stabilise your working hand, reducing shakiness.
Design Ideas and Techniques
Henna designs can range from simple to complex, and the possibilities are endless. Here are some techniques and ideas to inspire you:
- Draping: This technique involves creating continuous lines from point A to point B without breaks. It is a fundamental skill for creating flowing designs.
- Swirls and Dots: Combine swirls with dots to add depth and interest to your designs. You can also incorporate leaves and other motifs for variety.
- Using Stencils: If you’re not confident in freehand designs, consider using henna stencils. These pre-made stickers can help you achieve professional-looking results with ease.
Aftercare for Henna Designs
Once your design is complete, it is important to let the henna dry properly to achieve the best stain. Here are some aftercare tips:
- Drying Time: Allow the henna to dry for at least 8-10 hours. For the best results, you can leave it on overnight.
- Protect the Design: Use a cloth adhesive tape to protect the design from accidental smudging while it dries.
- Removing the Paste: After the drying period, gently flake off the henna paste. Avoid washing the area immediately, as water can reduce the stain’s longevity.
Tips for Beginners
Using a henna cone can be challenging at first, but with practice, you will improve. Here are some tips to help you along the way:
- Practice Regularly: The more you practice, the more comfortable you will become with the henna cone. Try practising on different surfaces to refine your skills.
- Be Patient: Henna application is an art that requires patience. Don’t be discouraged by initial mistakes; they are part of the learning process.
- Experiment: Don’t be afraid to experiment with different designs and techniques. This will help you discover your personal style and preferences.
Common Mistakes and How to Avoid Them
Even experienced henna artists make mistakes, but being aware of common pitfalls can help you avoid them:
- Uneven Lines: If your lines are uneven, try adjusting the pressure or practising on paper to improve your control.
- Smudging: To prevent smudging, avoid touching the design while it dries and use adhesive tape for protection.
- Fading Stain: To maintain a vibrant stain, minimise exposure to water and apply aftercare oil to moisturise the skin.
Conclusion
Using a henna cone is a rewarding and creative process that allows you to express yourself through beautiful body art. By following these steps and practising regularly, you can master the art of henna application. Remember to start simple, be patient, and most importantly, enjoy the process. Whether you are decorating your hands for a special occasion or simply exploring a new hobby, henna offers endless possibilities for artistic expression. So, grab your henna cone and start creating!